
This article explains how to configure Okta to enable Single Sign On in Cydarm
To enable users to authenticate using Okta, we must first go to the Okta administration console and configure an application.
Step 1: Access applications section
- Navigate to the Applications section in your Okta admin console
- Click Create App Integration

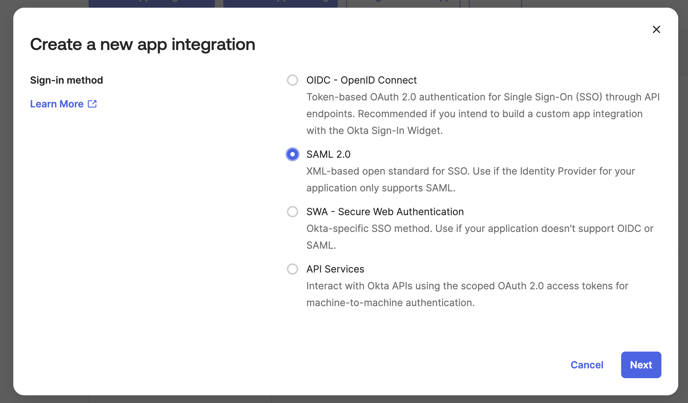
Step 2: Select sign-in method
- In the Create a new app integration dialog, select SAML 2.0 as your sign-in method
- SAML 2.0 is described as XML-based open standard for SSO. Use if the Identity Provider for your application only supports SAML.
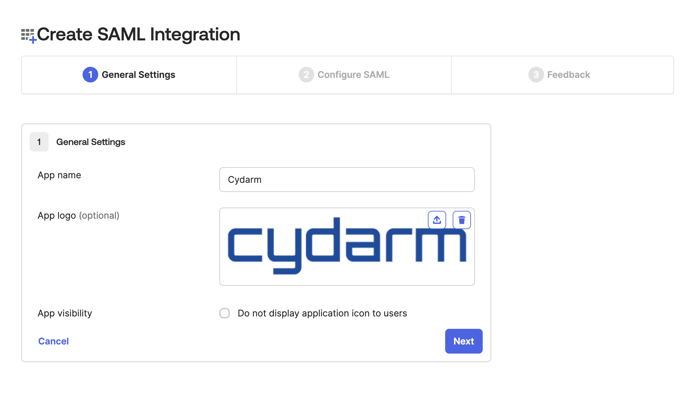
Step 3: Configure general settings
- App name: Enter Cydarm (or your preferred name)
- App logo (optional): Upload the Cydarm logo if desired
- App visibility: Leave unchecked unless you want to hide the application icon from users
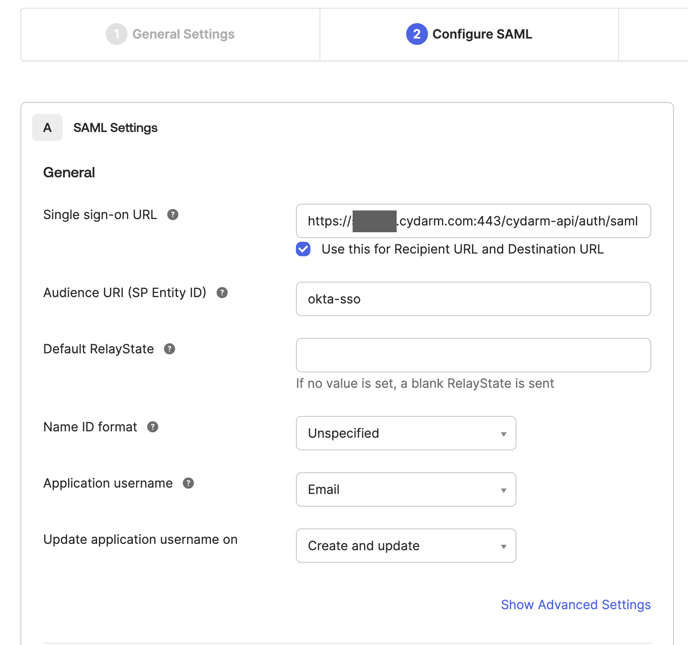
Step 4: Configure SAML settings
In the SAML Settings section, configure the following:
General settings:
- Single sign-on URL: Eg.
https://staging.cydarm.com:443/cydarm-api/auth/saml- ⚠️ Note that inclusion of the
:443is important! - ✅ Check Use this for Recipient URL and Destination URL
- ⚠️ Note that inclusion of the
- Audience URI (SP Entity ID): Enter
okta-sso(or a unique identifier)- ⚠️ Make sure to record this value!
- Default RelayState: Leave blank (optional)
- Name ID format: Select Unspecified from dropdown
- Application username: Select Email from dropdown
Attribute statements (optional):
Configure user attributes to be passed to Cydarm (this step is useful for the option of auto-provisioning accounts):
- FirstName
- Name format: Unspecified
- Value: user.firstName
- LastName
- Name format: Unspecified
- Value: user.lastName
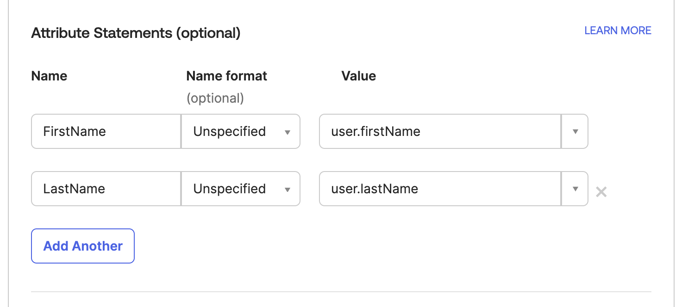
Click Add Another to add additional attributes as needed.
Step 5: Complete integration setup
- After completing the SAML configuration, you'll see the application created successfully
- The application will show as Active in your Applications list
- Note the Metadata URL which will be displayed in the Sign On tab

Step 6: Configure Cydarm
- If you are a hosted customer: Log a support ticket with the metadata URL and Audience URI
- If you are an Enterprise customer (on premise): Follow the SAML SSO Configuration guide
Step 7: Assign users to the application
- Go to the Assignments tab of your Okta administration console
- Click Assign and choose:
- Assign to People: To assign individual users
- Assign to Groups: To assign entire groups
- Search for and select the users or groups that need access to Cydarm
- Click Assign to complete the assignment
The interface will show assigned users and groups, and you can filter by People or Groups using the dropdown menu.

Verification
Once configured:
- Users assigned to the Cydarm application will see it in their Okta dashboard
- From the Cydarm application, clicking SSO Login will cause the user to be automatically signed in via SAML SSO
Troubleshooting
- Ensure the Single sign-on URL exactly matches your Cydarm instance URL with the correct port (443)
- Verify that the Audience URI matches what is configured in Cydarm
- Check that users are properly assigned to the application
- Review the metadata URL is correctly provided to your Cydarm administrator
For more detailed technical information please refer to our Cydarm API documentation.